


A helmet counterweight is a weighted pouch or plate that mounts to the rear of a helmet to offset the forward load of front-mounted gear, most commonly night vision. It sounds like a minor accessory, but anyone who has worn night vision for more than a few minutes understands why it matters: an unbalanced helmet strains your neck, shifts under movement, and becomes genuinely uncomfortable fast. The counterweight fixes that.
This guide explains why a counterweight matters, what goes in one, and how to set it up.
Why a Counterweight Matters
When you mount night vision (or any significant gear) to the front of a helmet, you move the helmet’s center of gravity forward. That forward weight does two bad things. First, it constantly pulls the helmet down and forward, which your neck muscles have to fight the entire time you wear it. Over a long night that becomes real fatigue and strain. Second, the forward bias makes the helmet want to shift and rock when you move your head, run, or go prone, which is both distracting and a stability problem when you need a steady sight picture through the optics.
A counterweight on the rear of the helmet pulls the center of gravity back toward the center of your head. It does not eliminate the total weight you are carrying (it actually adds a little), but it balances the load so your neck is not fighting a forward lever all night. A properly counterbalanced helmet feels noticeably more stable and less tiring, even though it weighs slightly more than the uncounterweighted version.
When You Need One
The clearest case is night vision. The moment you mount an NVG to the front shroud, you want a counterweight. The forward load of even a single tube, let alone a dual-tube setup, is enough to justify it.
You may also want a counterweight if you run a front-mounted camera, a heavy light, or any other significant gear on the front of the helmet. If the helmet feels nose-heavy or rocks forward when you move, a counterweight is the fix. If you run a bare helmet or only light rail accessories, you probably do not need one.
What Goes in a Counterweight
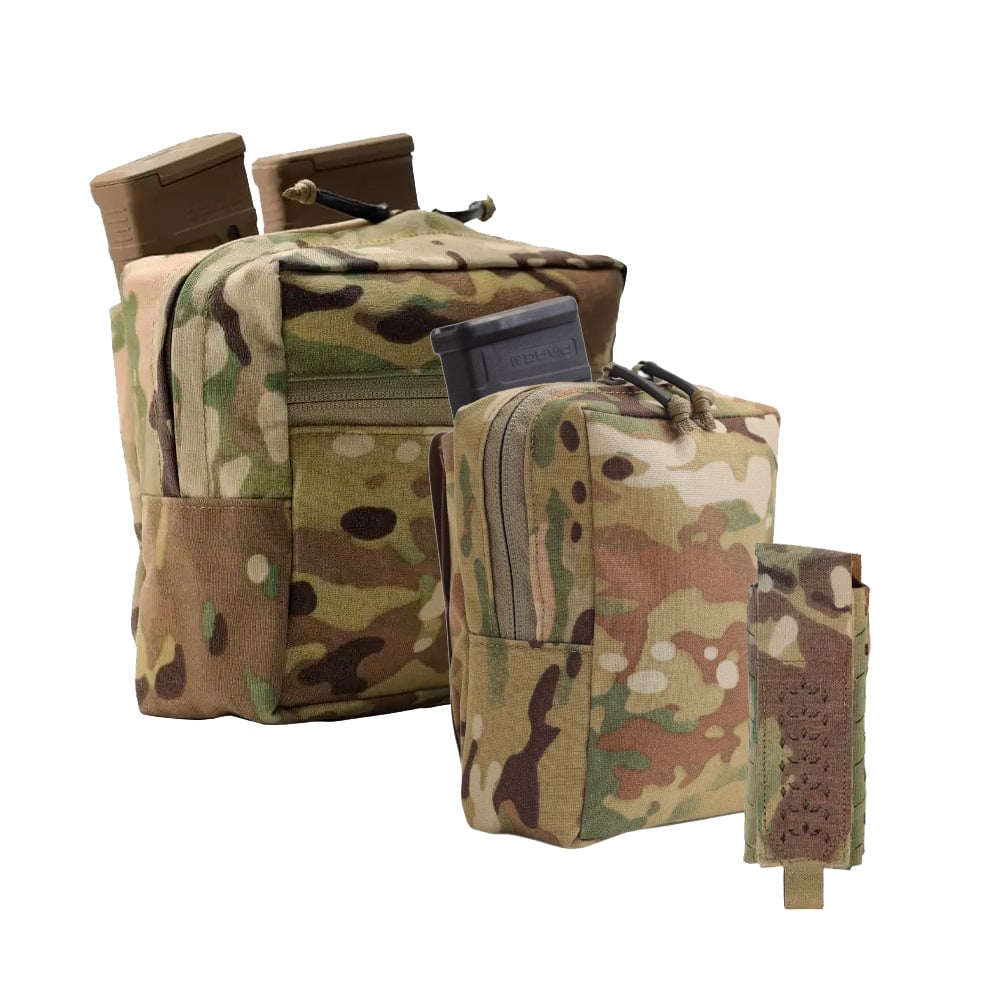
Counterweight pouches are designed to hold weight, and you have options for what that weight is. The classic approach is to fill the pouch with something useful you would carry anyway: spare batteries (which a night vision setup needs regardless), a small amount of gear, or purpose-made counterweight blocks. Using batteries as the counterweight is popular because it does double duty: the weight balances the helmet and the batteries are your resupply for the optics.
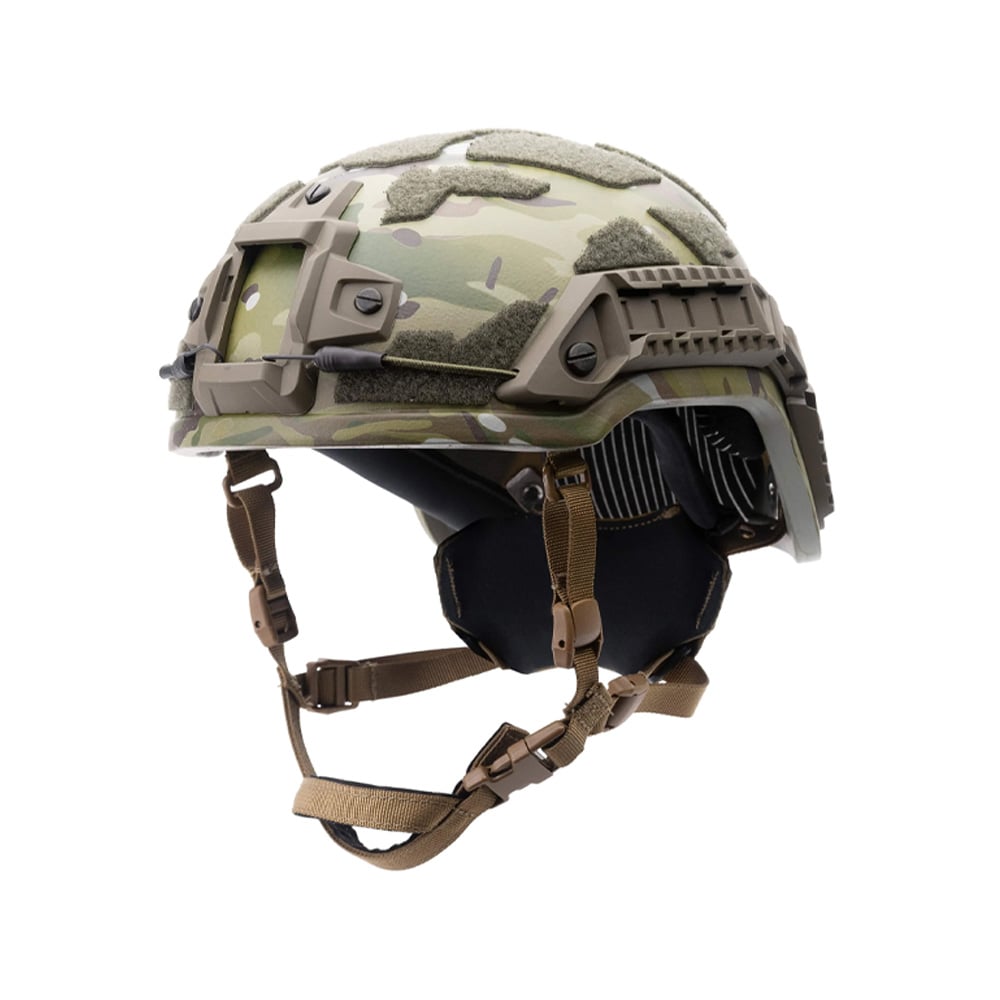
Our ArmorSource Counterweight mounts to the rear of the helmet and provides the rear-balance pouch. Load it to match the forward weight of your specific night vision setup; heavier front gear needs more rear counterweight to balance.
How to Set It Up
- Mount your front gear first. Get the night vision or front accessory on the helmet so you know the actual forward load you are balancing.
- Attach the counterweight pouch to the rear of the helmet, on the rails or the rear shroud depending on your setup.
- Add weight gradually. Start with a moderate load (batteries are a good baseline) and put the helmet on.
- Test the balance. The helmet should feel centered, not nose-heavy and not tail-heavy. Tip your head, look up and down, move around. Adjust the weight until the helmet sits stable and balanced.
- Confirm with your retention dialed in. A balanced helmet plus a solid retention system is what gives you a stable platform. See our helmet accessories and setup guide for the retention side.
The goal is balance, not maximum weight. Add just enough rear weight to center the helmet. Overloading the rear creates a tail-heavy helmet that is just as uncomfortable as a nose-heavy one.
FAQ
What is a helmet counterweight?
A helmet counterweight is a weighted pouch mounted to the rear of a helmet to offset the forward load of front-mounted gear like night vision. It rebalances the helmet’s center of gravity so your neck is not fighting a forward pull, making the helmet more stable and less fatiguing.
Do I need a counterweight for night vision?
Yes, in almost all cases. Mounting night vision to the front shroud shifts the helmet’s weight forward, straining your neck and making the helmet rock. A rear counterweight balances that load. The moment you add an NVG, you want a counterweight.
What do you put in a counterweight pouch?
Spare batteries are the popular choice because they do double duty: they balance the helmet and serve as resupply for your optics. You can also use purpose-made counterweight blocks or small useful gear. Load it to match the forward weight of your specific setup.
Does a counterweight add too much weight?
It adds a little total weight, but it makes the helmet feel lighter and more stable because your neck is no longer fighting a forward lever. The balanced load is far less fatiguing than a lighter but nose-heavy helmet. Balance matters more than absolute weight.
How much counterweight do I need?
Enough to center the helmet against your specific front load. Heavier front gear (dual-tube night vision) needs more rear weight than a single tube. Add weight gradually and test the balance until the helmet sits centered, not nose-heavy and not tail-heavy.
Where does the counterweight mount?
On the rear of the helmet, attaching to the rear rails or the rear shroud depending on your helmet setup. It needs to sit at the back to counterbalance the front-mounted gear. Pair it with a solid retention system for a stable platform.
Bottom Line
A counterweight balances the forward load of night vision and front-mounted gear, taking the strain off your neck and stabilizing the helmet. Mount your front gear, attach the rear counterweight, and add weight (batteries work well) until the helmet sits centered. Aim for balance, not maximum weight.
Our ArmorSource Counterweight provides the rear-balance pouch. For the full helmet build, see our helmet accessories and setup guide.