


Helmet Accessories and Setup: Rails, Covers, Pads, and Mounts
Helmet accessories and setup: rails, covers, pads, retention systems, and NVG mounts. How to build out a ballistic or bump helmet the right way.
A ballistic or bump helmet is a platform. The shell is just the starting point. What turns it into functional kit is the accessories: the rails that mount your gear, the pads that make it wearable, the retention system that keeps it stable, the cover that quiets and camouflages it, and the mounts that carry night vision and lights. Setting a helmet up correctly is as much about the accessories as the shell.
This guide walks through the helmet accessory categories, what each does, and how to build out a helmet the right way.
Helmet Rails
Rails are the side-mounted attachment tracks that run along both sides of a modern helmet. They are the foundation of the helmet’s accessory ecosystem: lights, cameras, counterweights, ear protection, and many mount adapters attach to the rails rather than directly to the shell.
If your helmet did not come with rails or you are upgrading an older shell, adding rails is usually the first accessory step. Our PGD ARCH/MICH Helmet Rails fit ARCH and MICH-pattern shells and open up the full range of rail-mounted accessories. Match the rail system to your helmet’s mounting pattern before buying.
Helmet Pads
Pads are the interior foam system that sits between your head and the shell. They do two jobs: they provide the comfort that makes a helmet wearable for hours, and they provide the standoff and impact absorption that protects your head from blunt impact. A helmet with bad pads is a helmet you will not wear, and a helmet with worn-out pads does not protect as well against impact.
Pad systems come in different thicknesses and layouts so you can tune the fit and the ride height of the helmet. Our D3O Halo Helmet Liner System is a premium pad system using D3O impact-absorbing material, which stays flexible at rest and stiffens on impact for better blunt-force protection. Replacing tired pads is one of the cheapest upgrades that meaningfully improves a helmet.
Retention Systems
The retention system is the chin strap and the dial or harness that lock the helmet to your head. A good retention system keeps the helmet stable when you move, run, or go prone, and keeps it from shifting when you mount night vision that changes the helmet’s balance. A helmet that wobbles is a helmet that is not doing its job.
Dial-based retention systems let you tighten or loosen the fit quickly with one hand. Our Helmet Dial Retention System upgrades older strap-only setups to a stable, dial-adjustable fit. If your helmet shifts under load or when you add front-mounted gear, the retention system is usually the fix.
Helmet Covers
A helmet cover is a fabric shell that fits over the helmet. It does several things: it cuts noise and glare off the shell, it lets you run camouflage patterns or unit markings, it protects the shell finish, and many covers add loop fields for IR markers, glint tape, and small accessories.
We carry covers for multiple helmet patterns, including the Helmet Cover With Retention System, the Ghillie Scrim Helmet Cover for adding natural-material camouflage, and pattern-specific covers for ARCH, ACH, and FAST shells. Match the cover to your specific helmet model and size for a clean fit.
Night Vision and Light Mounts
The front of a modern helmet carries a shroud for mounting night vision. A night vision mount (sometimes called a shroud or a mount plate) attaches to the front of the shell and accepts an NVG arm. Lights and cameras mount to the side rails.
If you run or plan to run night vision, the helmet needs a front shroud rated for the weight and the mount type your device uses. Adding night vision to the front of the helmet shifts the balance forward, which is why a counterweight on the rear and a solid retention system matter once NVGs are in the picture. Build the mounting solution around the specific device you run.
The Helmet Brand Landscape
If you are new to helmets, the brand landscape is worth understanding as context. A handful of manufacturers dominate the conversation, and each is associated with a particular reputation. This is background, not a buying directive: shells, cuts, and accessory ecosystems matter more than the name on the side.
- Team Wendy is known for premium impact-liner technology and is widely issued in high-end military and tactical circles. The name comes up constantly in liner and retention discussions.
- Ops-Core is closely associated with the FAST helmet pattern and a deep rail and accessory ecosystem. Much of the modern high-cut aesthetic traces back to their designs.
- Galvion (formerly Revision) produces ballistic helmets and powered head-borne systems used by militaries internationally.
- Protection Group Denmark (PGD) is a European manufacturer offering ballistic helmets, rails, covers, and accessories at a strong value-to-protection ratio. PGD is the helmet and accessory line we stock and recommend, including the PGD ARCH/MICH rails covered above.
The practical takeaway: the big names all make capable gear, and the accessory categories in this guide (rails, pads, retention, covers, mounts) apply across all of them. We carry and stand behind the PGD line, which delivers the protection and the accessory compatibility most buyers need without the premium-brand price. If you want help matching a shell and accessories to your use case, reach out and we will walk you through it.
How to Set Up a Helmet: Order of Operations
- Start with the shell. Pick a ballistic or bump helmet in the right cut and size. See our bump vs ballistic helmet guide to choose.
- Dial in the pads. Get the interior pad system fit and ride height right first, because everything else builds on a helmet that sits correctly.
- Set the retention. Adjust or upgrade the retention system so the helmet is stable and does not shift.
- Add rails. If the shell needs them, mount rails to open up the accessory ecosystem.
- Mount the front shroud and NVG solution if you run night vision, and balance with a rear counterweight.
- Add the cover last, fitted over the built-out helmet for noise reduction, camouflage, and marker real estate.
Bottom Line
A helmet is a platform built out with accessories. Start with pads and retention to make it wearable and stable, add rails to open the accessory ecosystem, mount a front shroud and counterweight if you run night vision, and finish with a cover. Each piece has to match your specific helmet pattern.
Browse our full helmet accessory lineup in the Helmets category. To choose the shell itself, see our bump vs ballistic helmet guide, ACH vs MICH guide, and FAST helmet guide.
FAQ
At minimum, a comfortable pad system and a solid retention system, because those make the helmet wearable and stable. Rails, covers, and night vision mounts are added based on your mission. A range or training helmet may need only pads and retention; a tactical setup adds rails, a cover, and a front shroud.
Rails are the side-mounted tracks that let you attach lights, cameras, ear protection, counterweights, and mount adapters to the helmet. They are the foundation of the helmet accessory ecosystem. Most modern accessories attach to the rails rather than the shell directly.
Yes, a lot. Pads provide both the comfort that makes a helmet wearable for hours and the standoff and impact absorption that protects against blunt force. Worn-out pads reduce comfort and protection. Upgrading pads is one of the cheapest meaningful helmet improvements.
Front-mounted night vision shifts the helmet’s balance forward. The fixes are a rear counterweight to rebalance and a solid dial-based retention system to lock the helmet in place. A strap-only retention system often is not enough once NVGs are mounted.
No. Helmet covers are cut for specific shell patterns and sizes (ARCH, ACH, FAST, and others). A cover for one pattern will not fit another cleanly. Match the cover to your specific helmet model and size.
A shroud is the front mount on a helmet that accepts a night vision arm. It bolts to the front of the shell and provides the attachment point for an NVG mount. If you run night vision, the shroud needs to match your device’s mount type and be rated for the weight.
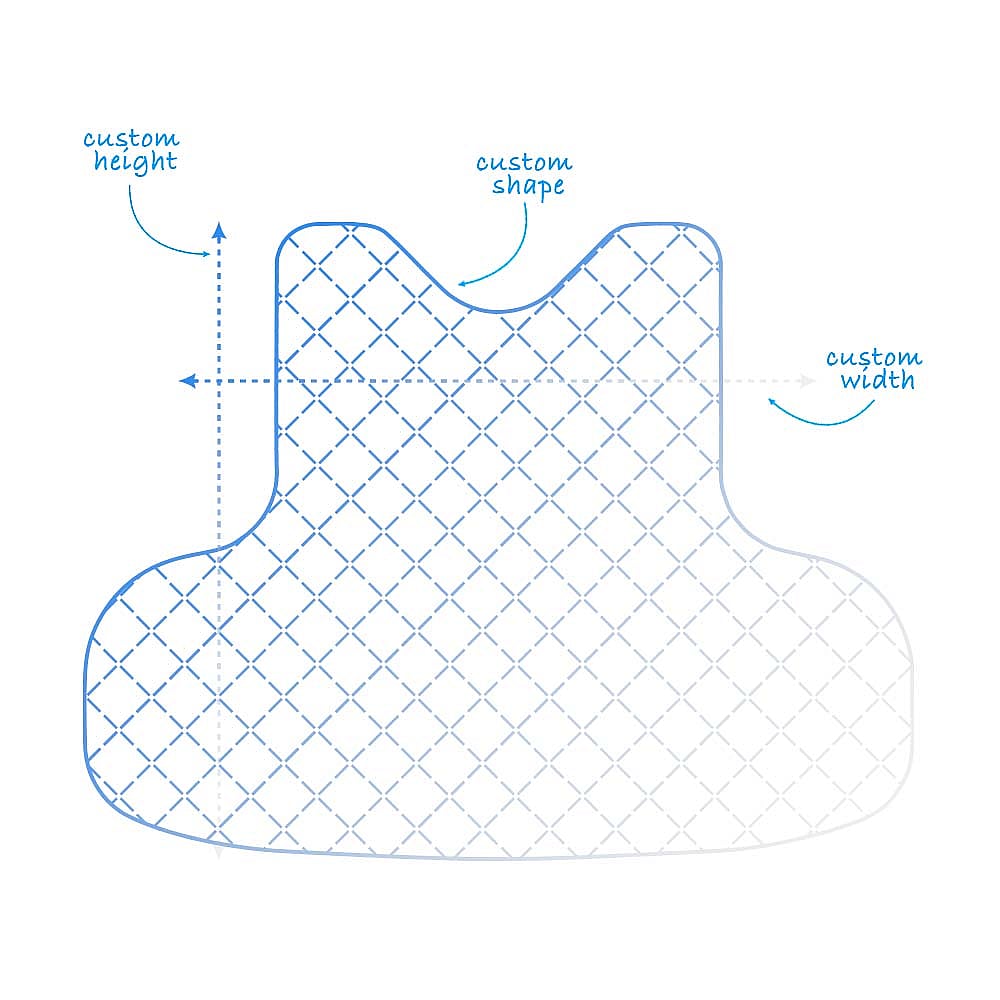
Custom Soft Armor: How to Get Inserts That Actually Fit Your Carrier
Most soft armor doesn't fit the carrier you actually own. Here's how our Custom Soft Armor program solves the fit problem and when to choose custom…
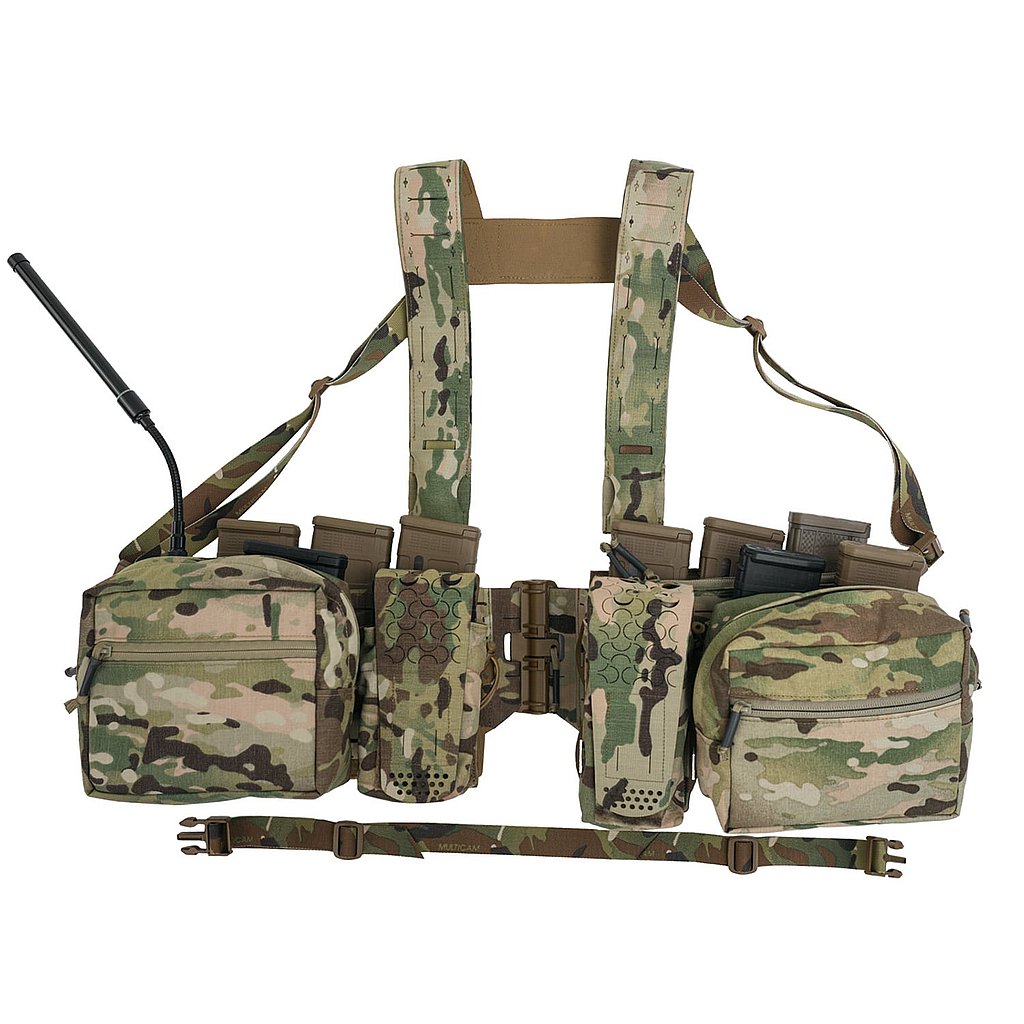
Layering a Chest Rig Over a Plate Carrier: When and How
Layering a chest rig over a plate carrier gives you ballistic protection plus high-capacity gear carriage. The SRV Split Chest Rig is purpose-built for this layered…
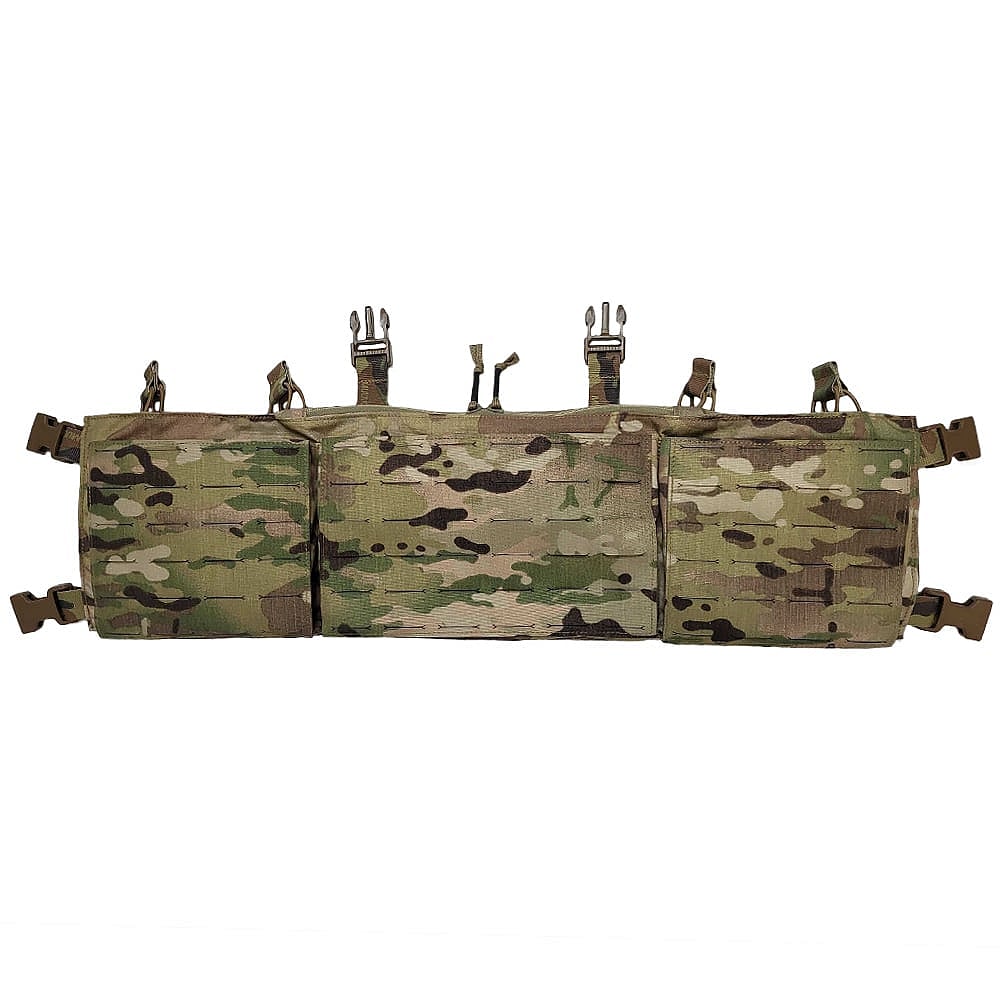
Best Chest Rig: How to Pick the Right Rig for Your Role
The best chest rig is the one that matches your role, mag count, and platform. Here is how to pick between continuous, modular, split, and minimalist…