


How to Zero a Red Dot Sight
How to zero a red dot sight: which zero distance to choose, how zeroing works, and a step-by-step process to get your optic dialed in.
Zeroing a red dot is the process of aligning your optic so the dot lands where the bullet hits at a chosen distance. A fresh optic out of the box is not zeroed to your rifle, and an unzeroed dot is just a glowing reference that does not match your point of impact. Zeroing is the step that turns a mounted optic into an aiming system you can trust. The good news: it is straightforward, and you can do it at the range in a few groups of ammunition.
This guide explains how zeroing works, which zero distance to choose, and a step-by-step process to get your red dot dialed in.
What Zeroing Actually Does
Your bullet does not travel in a straight line from the muzzle. It leaves the barrel below your line of sight (the bore sits below the optic), rises up through your line of sight, and arcs back down due to gravity. Zeroing adjusts the optic so the dot and the bullet’s path intersect at a specific distance you choose. That intersection point is your zero.
Because the bullet’s path is an arc, your point of impact relative to the dot changes at different distances. A rifle zeroed at one distance will hit slightly differently at closer and farther ranges. Choosing the right zero distance is about picking the arc that best fits how you will use the rifle.
Which Zero Distance to Choose
For a general-purpose carbine, the most popular choice is a 50-yard zero, often called a 50/200 zero. Because of the bullet’s arc, a rifle zeroed at 50 yards is also very close to zero at 200 yards, with only minor deviation in between. This gives you a usable point-of-aim, point-of-impact relationship from close range out to a few hundred yards, which suits most defensive and general use.
The other common option is a 25-yard zero, which is convenient at indoor ranges with limited distance and roughly approximates a longer zero due to the arc. A 100-yard zero is also used, particularly for precision-oriented setups. For most red-dot carbine users, the 50-yard zero is the recommended default. Pick the distance that matches your range access and your intended use, then be consistent.
What You Need
- Your rifle with the red dot mounted securely (mount bolts properly torqued)
- A stable shooting position: a bench with a rest, bags, or a bipod
- A target with a clear aiming point at your chosen zero distance
- Enough ammunition for several groups (a box is plenty)
- The adjustment tool for your optic’s turrets, if it is not tool-less
The process below works for any quality red dot or holographic sight. If you are still choosing an optic, we carry the Holosun HS507C-X2 red dot and the EOTech EXPS3 holographic sight, and our guide on red dot vs holographic sights walks through the choice.
A stable rest is the single most important factor. You cannot zero accurately if your hold is wandering, because you will be chasing your own wobble instead of adjusting the optic. Get as stable as you can.
Step by Step
- Confirm the optic is mounted solid. A loose mount will not hold zero. Check that the mount is properly torqued before you start.
- Set up at your zero distance with a stable rest and a clear target.
- Fire a group of 3 to 5 rounds at the aiming point, using the same point of aim and a consistent hold for every shot.
- Measure the group’s center relative to your aiming point. The center of the group, not any single shot, is what you adjust to.
- Adjust the turrets to move the group toward the aiming point. The turrets are marked for direction (up/down, left/right) and value per click (commonly 1/2 MOA or 1 MOA per click). Dial the correction based on how far off the group center is.
- Fire another group and check. Repeat the adjust-and-confirm cycle until your group center sits on the aiming point.
- Confirm with a final group to verify the zero holds. One good group is luck; two confirms it.
Always adjust to the center of a group, never to a single shot. A single shot includes your wobble and the rifle’s natural dispersion; the group center is the true point of impact. Chasing single shots is the most common zeroing mistake and it sends people in circles.
Understanding Your Adjustments
Red dot turrets adjust in MOA (minutes of angle). One MOA is roughly one inch at 100 yards, half an inch at 50 yards, and a quarter inch at 25 yards. So if your optic adjusts in 1/2 MOA clicks and you are zeroing at 50 yards, each click moves your impact about a quarter inch. Knowing your click value and your distance lets you calculate roughly how many clicks a given correction needs, which saves ammunition.
A Note on Magnifiers
If you run a flip-to-side magnifier behind your red dot, zero the red dot first without the magnifier, then add the magnifier and confirm. The magnifier should not shift your zero since it sits behind the optic and only magnifies the existing sight picture, but it is worth confirming the dot still tracks true through the magnifier. The magnifier magnifies any parallax or alignment issue too, so a clean red-dot zero first is the foundation.
Bottom Line
Zeroing aligns your dot with your bullet’s point of impact at a chosen distance. Pick a zero distance (50 yards is the default for a general-purpose carbine), get stable, fire groups, adjust to the group center, and confirm. It takes about a box of ammo and pays off every time you shoot.
We stock Holosun red dots and EOTech sights. New to optics? See our guide on red dot vs holographic sights to choose the right one.
FAQ
For a general-purpose carbine, a 50-yard zero (also near-zero at 200 yards) is the most popular and recommended default. A 25-yard zero works for limited-distance indoor ranges, and a 100-yard zero suits precision setups. Pick the distance that matches your range access and intended use, then stay consistent.
Usually a box or less. You fire groups of 3 to 5 rounds, adjust, and repeat until the group center sits on your aiming point, then confirm with a final group. Most people get a solid zero in three to five groups.
Always adjust to the center of a group, never a single shot. A single shot includes your wobble and the rifle’s natural dispersion. The group center is the true point of impact. Chasing single shots is the most common zeroing mistake.
MOA is minutes of angle, the unit your adjustments use. One MOA is roughly one inch at 100 yards, half an inch at 50, a quarter inch at 25. Knowing your per-click value (often 1/2 or 1 MOA) and your distance lets you calculate corrections and save ammunition.
It depends on the mount. Quality mounts with a return-to-zero design often hold zero through removal and reinstallation, but you should always confirm with a group after remounting. Lower-quality mounts may shift and require a fresh zero.
It should not, since the magnifier sits behind the optic and magnifies the existing sight picture rather than altering it. Zero the red dot first without the magnifier, then add the magnifier and confirm the dot still tracks true.
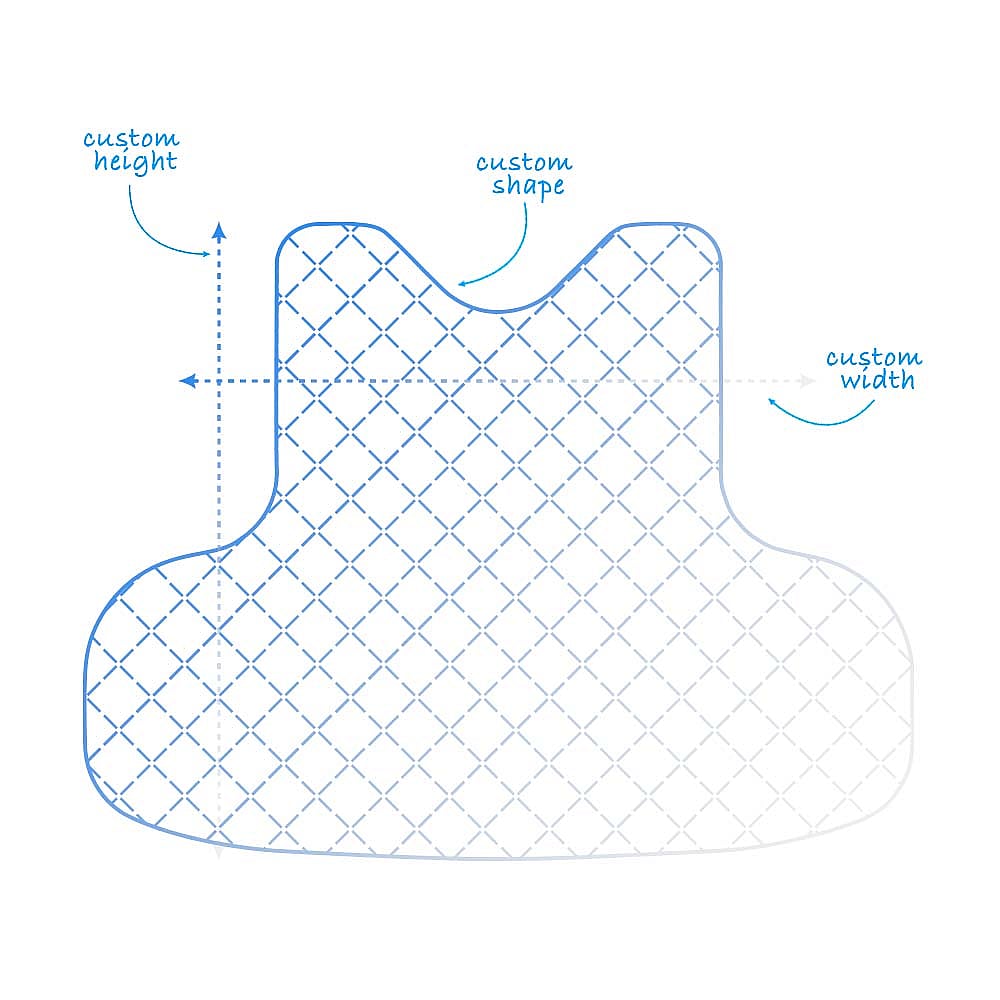
Custom Soft Armor: How to Get Inserts That Actually Fit Your Carrier
Most soft armor doesn't fit the carrier you actually own. Here's how our Custom Soft Armor program solves the fit problem and when to choose custom…
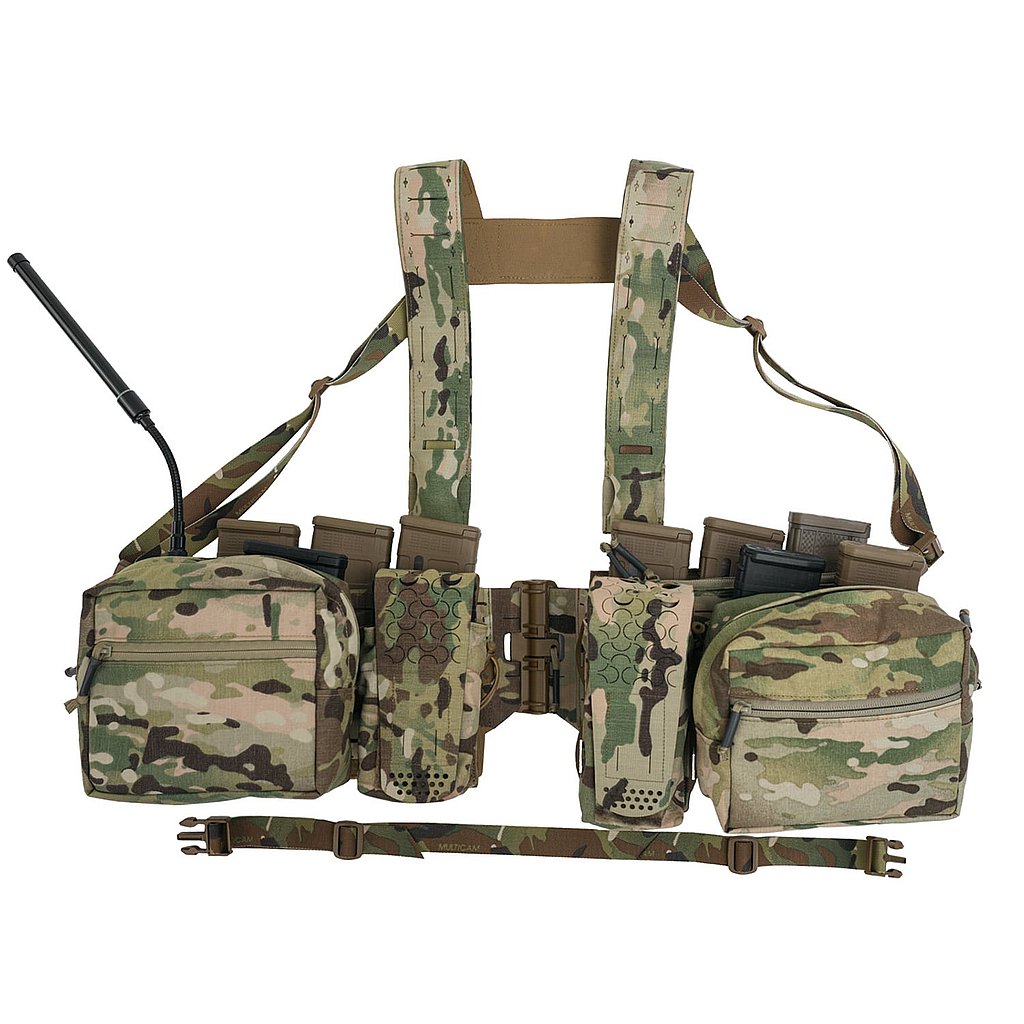
Layering a Chest Rig Over a Plate Carrier: When and How
Layering a chest rig over a plate carrier gives you ballistic protection plus high-capacity gear carriage. The SRV Split Chest Rig is purpose-built for this layered…
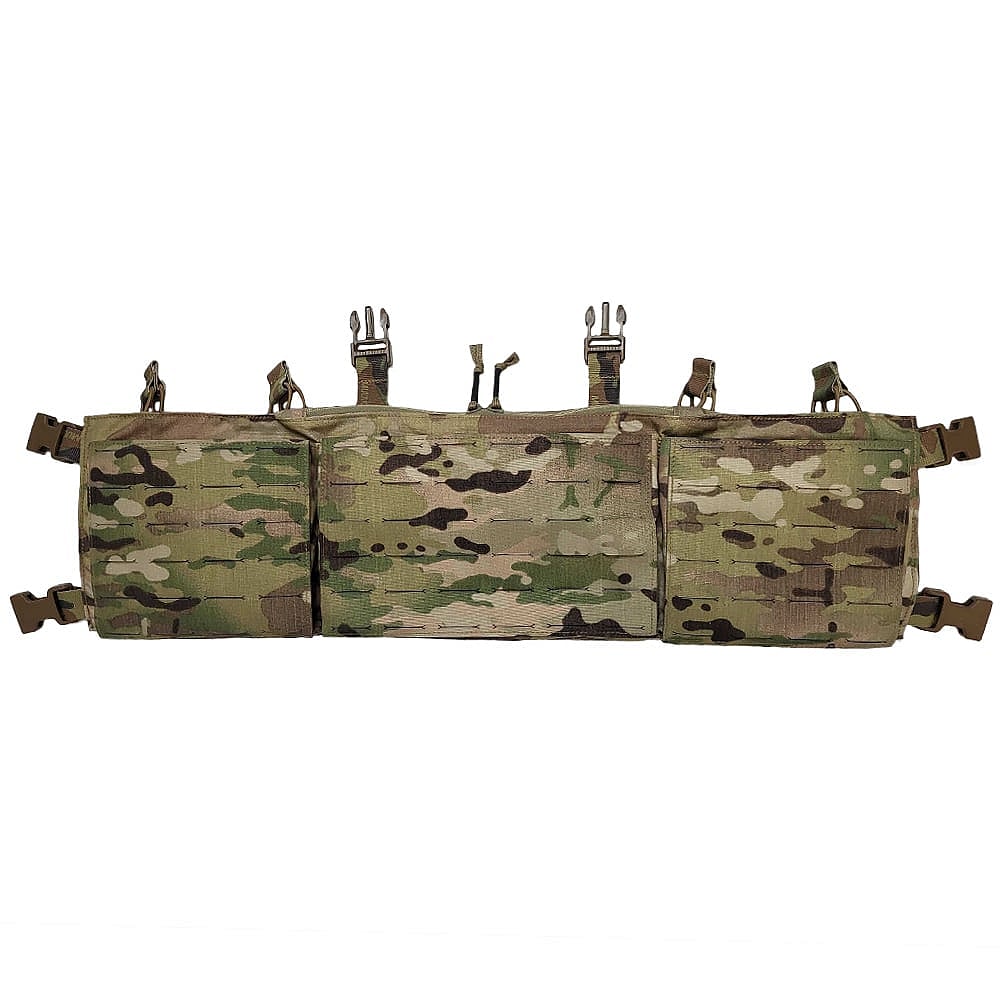
Best Chest Rig: How to Pick the Right Rig for Your Role
The best chest rig is the one that matches your role, mag count, and platform. Here is how to pick between continuous, modular, split, and minimalist…